Okay, if you cut down your own grown trees in winter, you have to split them in spring, and again stack the firewood in winter. That’s how many store the firewood.
The wet wood doesn’t burn efficiently, and you get only smoke, creosote, and poor heat. You don’t want to wander off to get a moist wood pile, and that too in cold months.
The proper storage of firewood helps prevent it from hosting snakes, rodents, and other pests, and from getting rotten, while also providing sufficient fuel on the homestead year-round. So, I have prepared this post after passing years of winter.
Why not Indoors
If you require only a small amount of firewood, you can keep it in your garage or indoors. But again, the firewood isn’t dry nicely as humidity builds up and molds form in the cellar or garage.
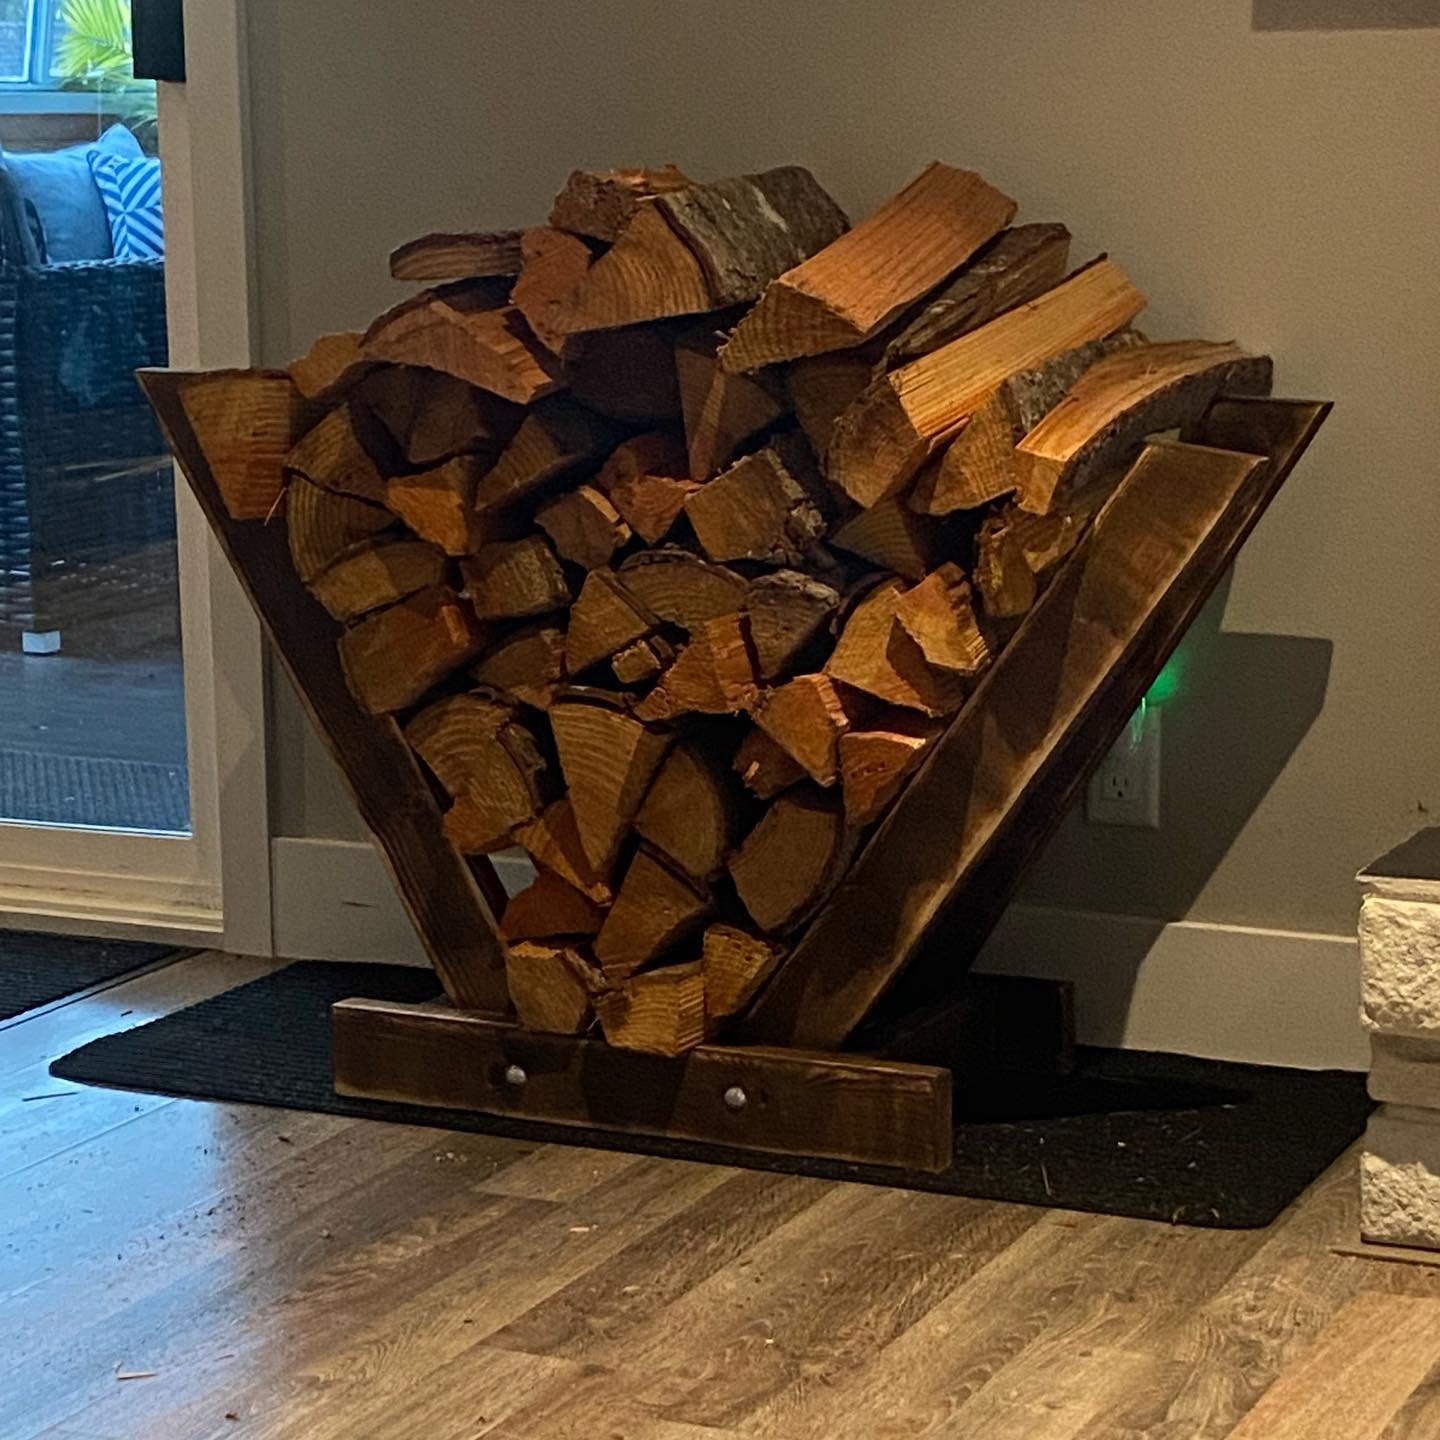
Also, you can store the firewood indoors in the DIY log rack in case you don’t want to bring it from outside one at a time.
Only take that to be burned within 2 days, and don’t put them up there near the wood burner.
That’s why I keep my firewood outside and bring pieces when required. With a large space, you can stock a large amount of wood pieces for a whole season or a year.
The outdoors help provide sufficient air to flow through the wood piles and prevent rotting.
Let’s Start with Location
If I am to build a new firewood storage, I want to find a place that is dry and helps season wood easily, so an elevated and well-drained area would be better.
Don’t stack your firewood against your house, as you don’t want termites or other wood-boring bugs nesting in that area, spreading to the structure, and making a way to your living space.
It attracts insects, rodents, fungus, etc, so you need to keep it 5 – 10 feet away.
I often stack my raw wood pile in the south direction while it’s seasoning. It helps get more sunlight and air.
Store Firewood with Proper Airflow
Step 1: Prepare for the Base
When you start stacking, consider that the floor is dry, but that doesn’t guarantee it will help your wood with ground moisture.
At times, rain and snow can dampen the floor throughout the year, so you need a stable and solid base that can help your stockpile remain dry.
For this, you can use wooden pallets, logs, bricks, and concrete blocks or cinder blocks plus 2x4s.
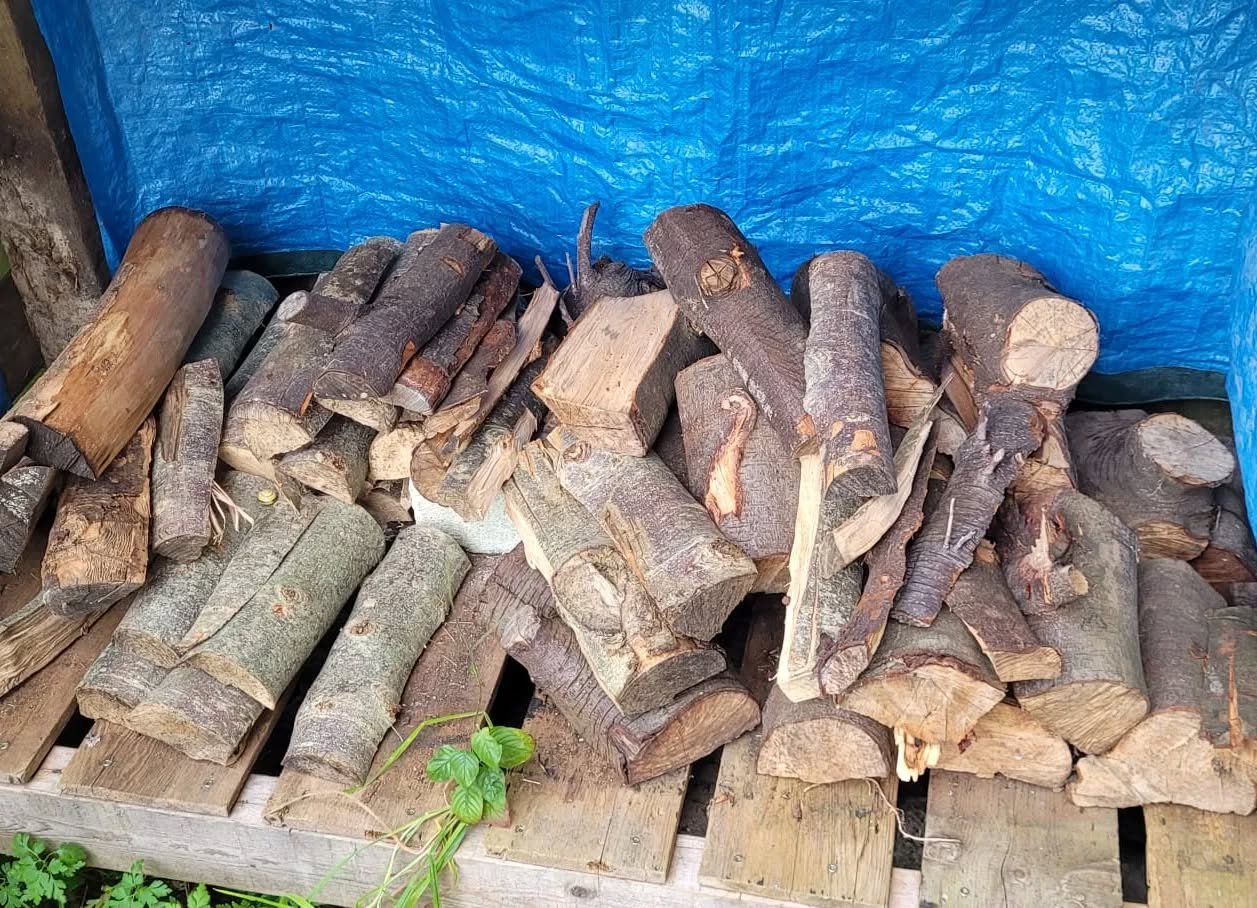
The longer you keep it outside, the more likely it is that the base will sink deeply into the ground due to the weight of the wood.
Many leave the firewood for a year or two to dry, and then only you can burn it, but I also burn wood that I split in the Spring.
The longer you take the stock pie to season, the better it makes for firewood and gets easier on the stove. The new stoves only do well with dry wood.
It all depends on the climate, sun exposure, and wind blown through the woods and stack volume. So, the base must keep the firewood off the ground until you withdraw all the sticks.
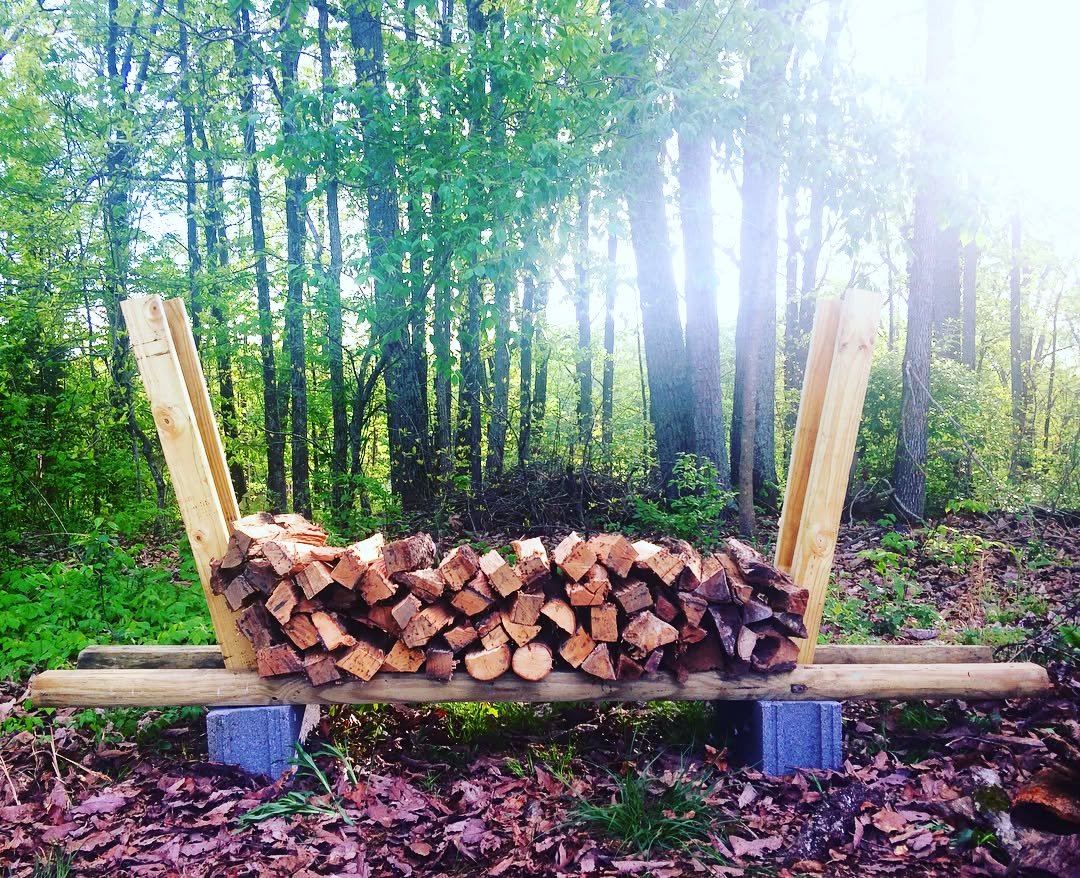
Step 2: Build a Stacker
Now, you need to make a stacker, where you can store your firewood. You can find multiple ways or methods to do it, such as rectangular, square, spiral, and other shapes. Also, X,U, and V shares are also there.
I find it is easy to make a wood rack with some 2X4s frames and cinder blocks.
So, you can start by laying down 3 blocks at a similar distance on the ground. Make sure it can hold the size of 2X4s wooden frames with 10 feet in length.
Before you do it, attach a 14-inch wooden frame of 2X4s to the 10-foot each to give it upright support. Place the wooden structure over the block and ensure it sits firmly.
To hold the pile vertically, your rack needs side support. For this, you need to place four 2X4s frames 5 feet each in the block holes. 2 frames on each side, with some tilts, but fitting in the holes well. Check that your stack structure is ready in a V shape.
If you’re lucky enough to have trees in a V or X shape, you don’t need to do this much work.
You can also use IBC totes or iron structures, which you can move with a tractor.
Step 3: Fill with Firewood
When storing the firewood, consider how many splits you have, which helps you decide the shape of the piles.
Though it all depends on your requirements, there are some standards that you can structure your stockpile accordingly.
| Types | Size |
| Face Cord | 8 x 4 x 1⅓ cu ft |
| Full Cord | 8 x 4 x 4 cu ft |
| 1/2 Cord | 8 x 4 x 2 cu ft |
| 1/4 Cord | 4 x 4 x 2 cu ft |
Start placing the firewood in the structure and stack bark-side down to shed water. Also, keep wood rows tight, but make sure it allows airflow between logs.

You can use the straight stacking method or stack your firewood criss-cross, one layer pointing one way, the next the other.
Fill the structure all the way from down to up. To quickly dry your stock, you need to alternate the direction of the stack.
If you have splits that were cut in spring, they fit together. Keep in mind that all wood pieces are split cleanly and of a similar size due to knots and branches. So, when they dry up, your stacks will end up having plenty of gaps.
This has a higher chance that your pile will collapse and you will have to restack.
Make sure that your pile is stacked straight and not leaning.
Step 4: Cover the Structure
When you store your firewood outside, expect the change of weather throughout the year. Rain, snowfall, and dew are common agents to moisten your firewood.
So, you need to protect your wood rack against these by topping it with several materials, such as tarp, corrugated roofing, old metal sheets, and canvas covers.
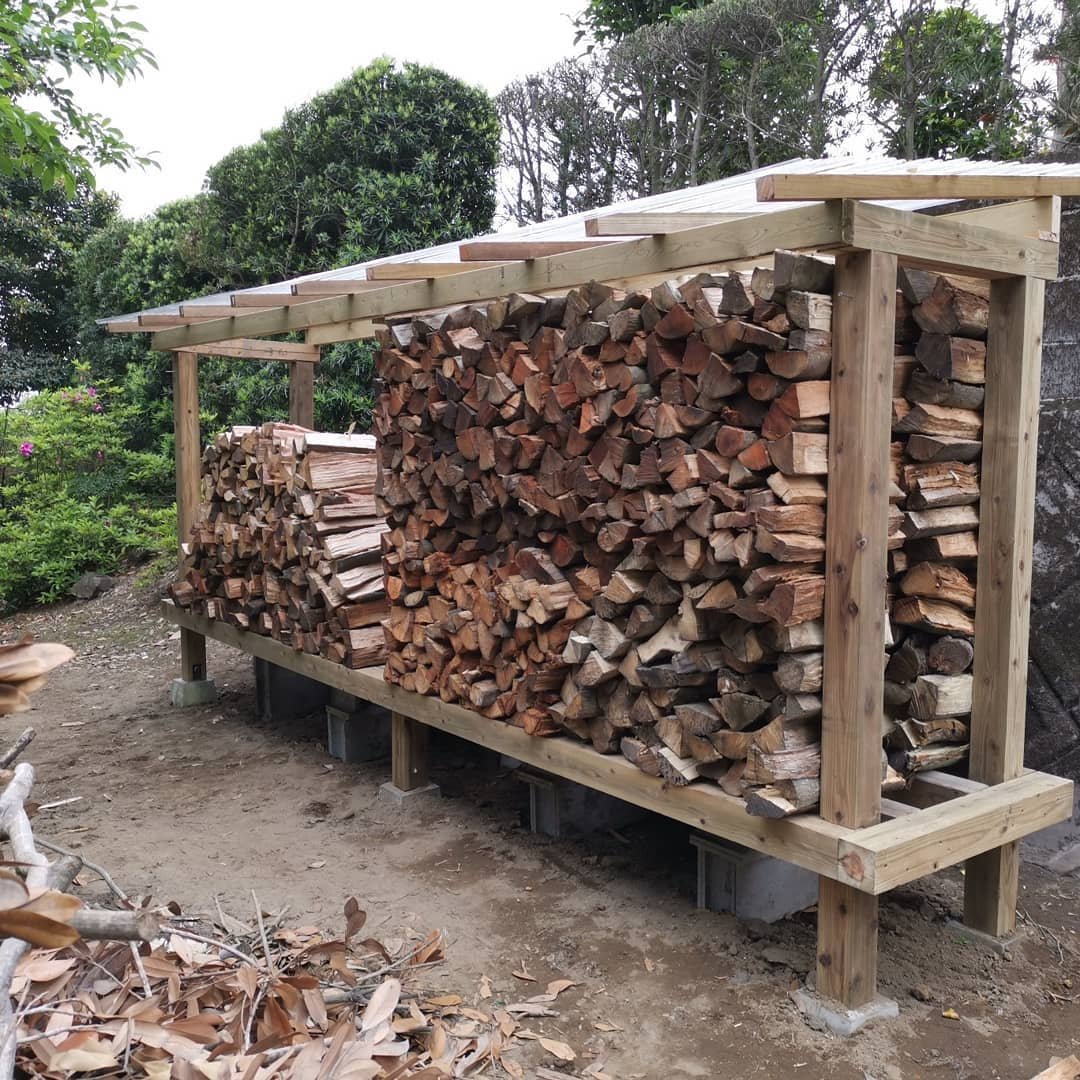
But make sure you cover it on the top only and don’t wrap it around the sides of the structure. Covering from all sides can trap the humidity and warmth. (But things can change in winter forever.)
A simple and cheapest option is a tarp with straps or rope, but you need to replace it frequently.
Besides, you can create a lean-to out of pallets, which is environmentally friendly, and you can place them together in several ways.
For instance, put any sort of pitch on the roof of the stack, line it with scraps of particle board and leftover barn siding. This can last for years.
Step 5: Winter Care
I keep my woods covered by raised tarps for airflow from spring to fall. Then, I lower the tarps around the wood before the first snow.
If you live in a mountainous area, you need to shovel out the woodpile that is actively in use during the winter due to heavy snowfall. And leave the others under the snow until spring.
The snow wind can fill the interior of the criss-cross stack. And if not fully, you can see the packs of snow on the sides in winter. But regular parallel stacking can save it from getting snow somehow, by stopping snow at the edge..
So, I find it is wise to cover the sides in winter in either case.
You need to be careful about the wood that you want to burn this winter, if it is moist. But if it’s seasoned for future seasons, you don’t have to worry.
When the snow begins melting in the spring, you need to dig out the top.
Some More Tips
- The firewood needs to have only 20% moisture to burn without difficulty. Otherwise, your homestead chimney will be full of smoke, and your stove will get hurt more.
- When the firewood starts cracking, it dries up well and is ready to use. But some woods, like ash, can burn the day you split them.
- The smaller you split the wood, the faster it dries, but small pieces burn fast, so they can’t be very great for a wood stove. Make sure to chop them to a length of no more than 16 inches.
- Build a woodshed instead. It feels like a bit of an expensive project, but it’s sustainable in the long run.
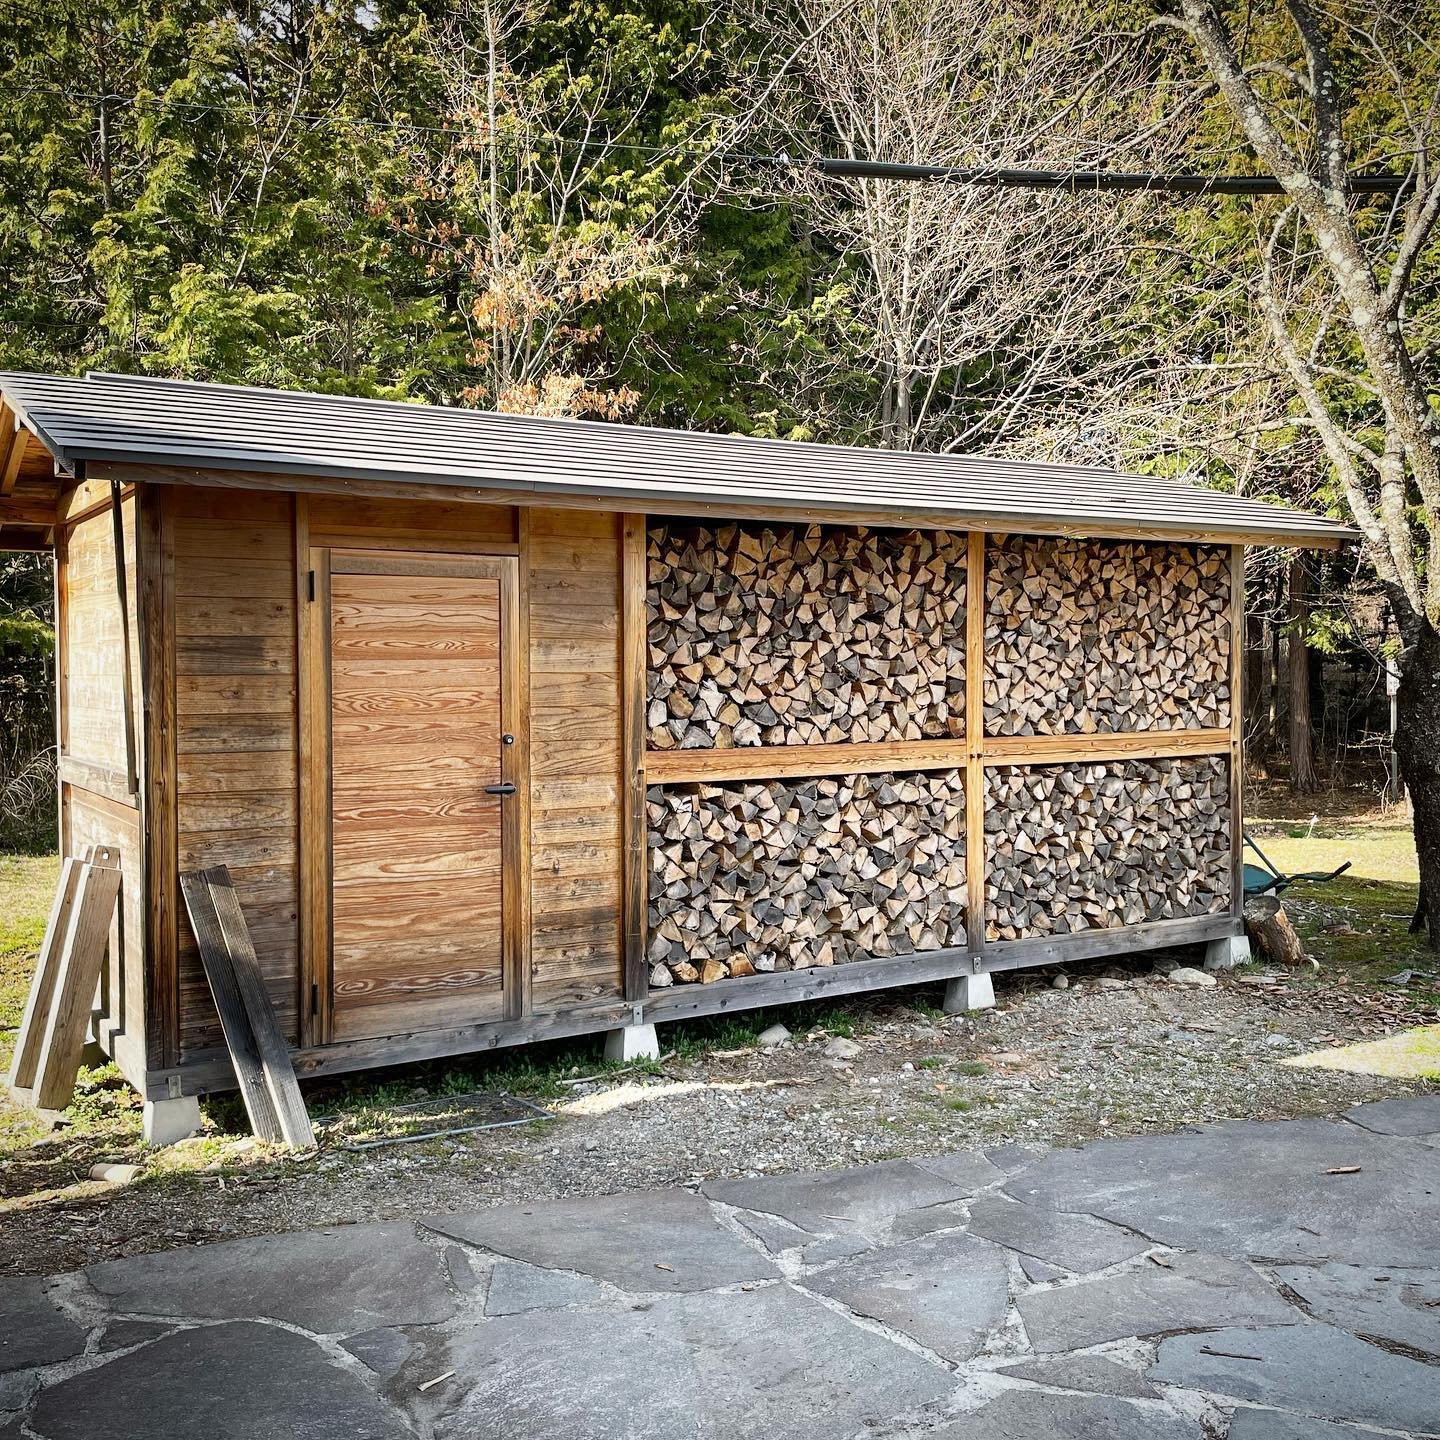
- It makes sense to have a small woodshed and some dry wood that is already seasoned if you live in a snowy area. There’ll be freezing rainstorms. But the shed is not for curing firewood.
- Place rocks of equal size, 2 inches each or smaller, and compact to lay a solid foundation of the stack to keep the bugs away.
- You can split the wood year-round and use pieces from the oldest pile, which means your stack may sit for 12 to 15 months.
Final Thoughts
When you store firewood outside in winter, you need to clean snow from the top of the stack or use sloped covers.
And if you want a long-term use, take the oldest wood first and rotate the stacking.


Leave a Reply